Technical Bulletins
Use the links below to download Advisory/Technical Bulletins for Privacy Plus Partitions.
Privacy Plus Partitions offers an extensive library of product, application and installation information as a value-added service for Architects, Building Developers, Facility/Property Managers, Distributors and Installers. A combination of downloads and hard copies are available.
For Partitions:

INSTALLATION GUIDELINES
Step 1: Measure
Measure and mark the area to prepare for installation and confirm with the room dimension stated on the provided “build plan.” Now mark the centers of each side panel.

Step 2: Anchor u-channels
Use the leveling boxes included with your Privacy Plus materials kit. Place the bottom of the u-channel on the top of the leveling box. This will be the height of the partition with a ceiling or floor-mount system. Make sure the u-channel is level. Affix the u-channels into the back wall, with anchors appropriate for the material of the wall.
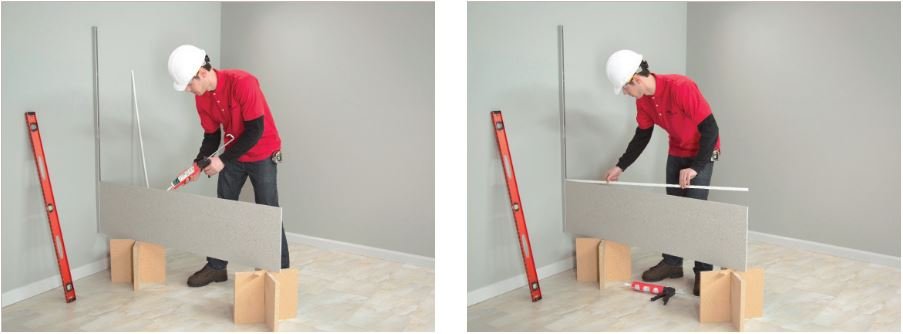
Step 3: Assemble privacy panels
The sectioned privacy panel walls are stronger than a monolithic panel, and offer a versatile selection of panel sizes and colors. They are also designed to flex out of square to eliminate the possibility of the panel pulling away from the back wall due to stress or gravity. Sectioned panels make it easy to trim on site if length adjustment is needed and helps to facilitate a one-man installation. Place second leveling box in position. Place first side panel into the u-channel and on top of both leveling boxes. Check to see if side panel is level. Use a shim to level if necessary. Once level, caulk the first side panel with silicone, placing an even bead of caulk across the top of the side panel, and then place the spline into position (groove placement). Wipe off excess silicone if needed. Caulk second side panel, then slide into place. Repeat for panel sections three and four.


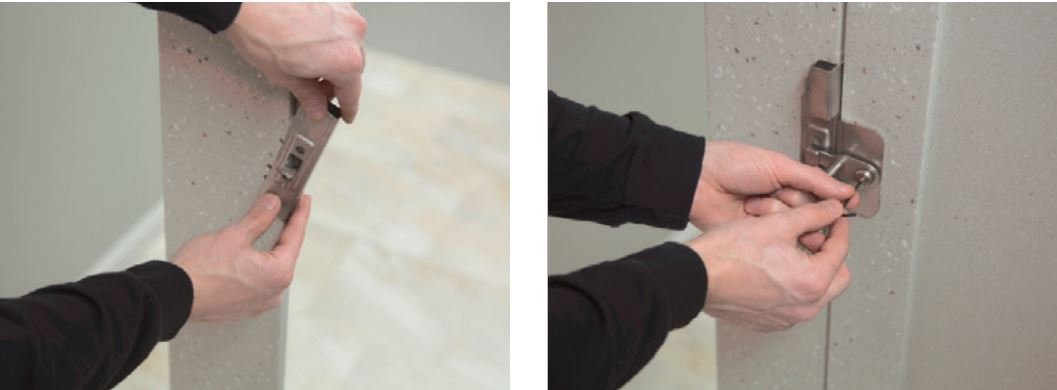
Step 4: Attach pilasters
MMake sure the completed privacy panel is square with the back wall. Slide the Corian ® cover boot over the top of the pilaster, using a clamp to hold in place. Next temporarily attach the pilaster to the structural steel header with C-clamps. Note: It is important to make sure that the pilaster is plumb and level.
Drill four holes through both the faceplate of the pilaster and structural support in an “X” formation. For pilasters with wider plates, drill holes in the four corners for stability. Space the holes as far apart as possible on the steel plate. Secure with the provided bolts, nuts and
washers. Before tightening, once again check to make sure that the pilaster is plumb and level. With the provided bit, drill holes through the wall end of the Corian® privacy panel using the holes in the u-channel as a guide, then place pins through holes.
Repeat steps for the front end of the privacy panel at the pilaster.

Step 5: Attach door
Position the door hinge into the pre-fabricated slot of the pilaster and slide down into internal pins. Make sure the hinge is installed for the desired in-swing or out-swing position. Tap with a rubber mallet, if necessary, to ensure that the hinge is locked into place. Now attach the door to the other side of the hinge using the same method. For multiple compartments in a row, repeat these methods using the door as a guide for placement of the next pilaster.

Step 6: Striker/keeper hardware installation
Place the provided template on pilaster or door. Center it between the slot in the edge of the door or pilaster and secure with tape. Using the provided drill bit with stop collar, drill the holes in the positions provided on the template.
Note: For in-swing doors, install the striker portion of the hardware on the door and the keeper portion of the hardware on the pilaster. For out-swing doors, such as for ADA compartments, install the striker portion of the hardware on the pilaster and the keeper portion of the hardware on the door.
Step 7: Attach striker/keeper hardware
The striker/keeper hardware assembly attaches to the partition components using the same patented “Pin Lock” technology as the continuous hinges. In this case, the pins are installed in the field so they can be properly positioned if the need arises to trim the door. The hardware will hide and hold the pins in place. To install, first place the pins in the required holes as stated on the template. Next slide the notched leaf portion of the hardware into the slot and lock down onto the pins. Tighten hex bolt on latch to secure assembly with the provided Allen wrench. Make sure that the hex bolt is recessed below the face of the hardware to ensure that it can’t be unscrewed or tampered with. Then tighten striker and striker plate. Check for fit.


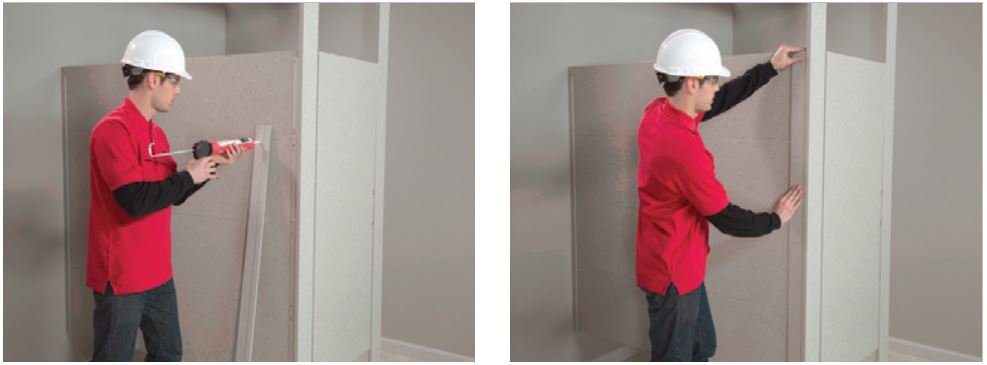
Step 8: Install trim
Place variable 3 – 4 inch silicone beads along length of trim. Then follow along with 6 – 7 dabs of glue. Attach in place and hold for 10 – 15 seconds until secure. Place a bead of silicone, followed by hot glue, across top of pilaster. Slide trim collar into place and hold until secure (for approximately 10 seconds).
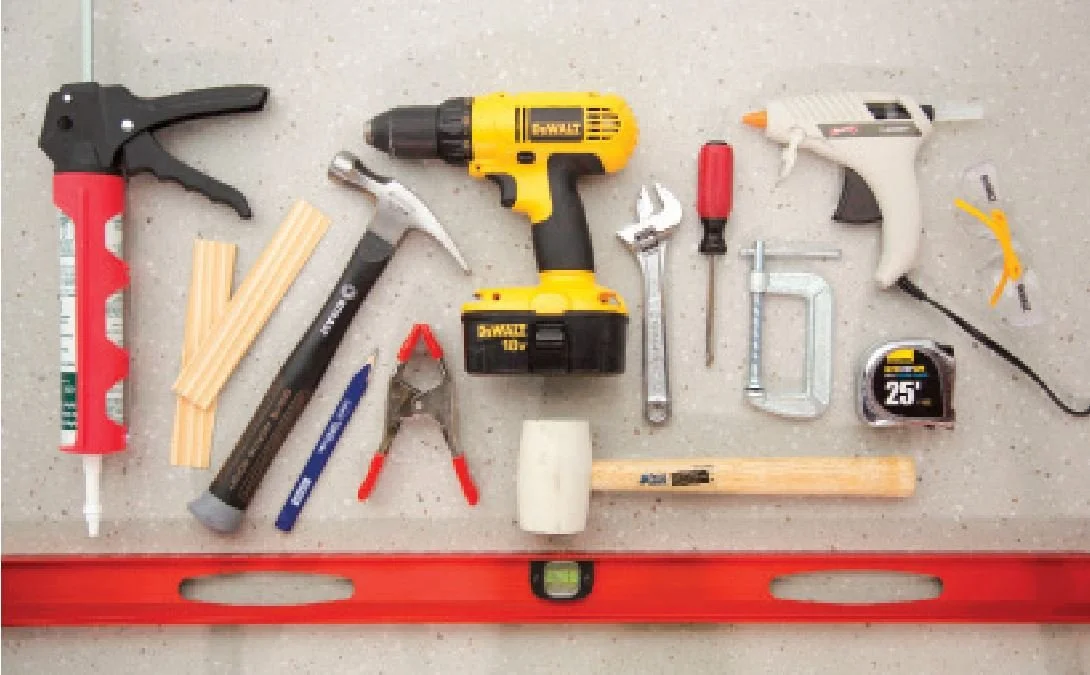
Tools required:
•Drill, 1/4’’ drill bit (for Corian®) (provided)
•Tape measure
•Pencil
•Level
•Allen wrenches (provided)
•Rubber mallet
• Phillips head screwdriver
• Hot glue gun and glue sticks
•2 “C” clamps
•2 spring clamps
•Caulk gun
• 2 adjustable crescent wrenches
•2 wood shims
• Silicone gun and silicone
•Leveling boxes (provided)
• Power tool for any door or pilaster edge adjustment
• Bolts, nuts and washers for pilaster installation (provided)
• Wall anchors/screws for U-channel installation, based on your specific wall construction